Grey Totoro – Free Crochet Pattern

Hi folks. This week my laptop is in the repair shop, so I’m sitting at a borrowed laptop while trying to plug the latest music single release from my friend Yunyu. It’s Dorothy (I wrote about the teaser trailer here), the first single from her Twisted Tales album, which is a music-manga collaboration between Yunyu and myself.

The official release date for Dorothy is 2nd March, 2012, but pop-culture sites Madman Entertainment, CoolShite and ToneDeaf has had an exclusive, early look at the full music video. You can click on the links I just wrote up, or you can wait until next Friday, when I do my full post on this project.

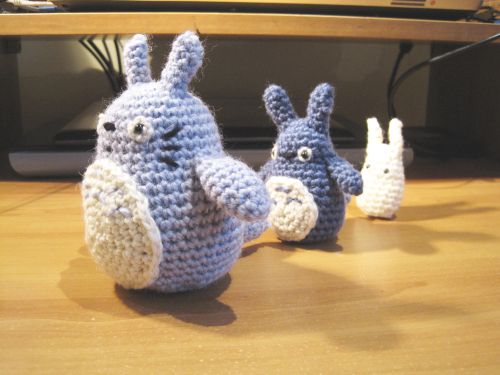
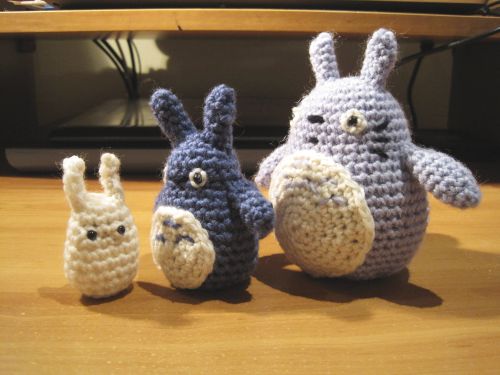
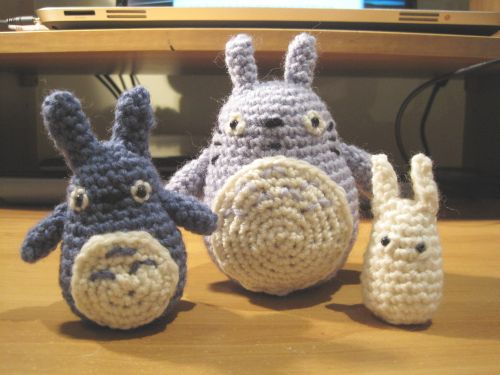
This week, as promised, I give you the grey Totoro pattern I had from 2 weeks ago. I have the blue and white Totoro patterns here, and given the way this is going, I guess I’ll have to create a new page for “free patterns” very soon.

 
All Totoro head


Grey Totoro Pattern

Here’s a list of what I used to make this crochet. It’s not a definite list, so feel free to use whatever you have, as long as it’s appropriate. It’s crocheted in the round, like most amigurumi, so only basic crochet skills are required.

NB. This pattern is created by me, so please give a link back to me if you want to use it or if you want to sell your crochet. Please give credit where it’s due. I should also that I don’t own the copyright to these characters – obviously Studio Ghibli does.

  • White, black and blue 8 ply yarn
  • 4mm crochet hook
  • Two pairs of 3mm black safety eyes – 6060 from Etsy is a good place to buy these
  • Large sewing needle, to sew the bits and pieces together


Crochet Abbreviations

Here are a list of the abbreviations I use, and what they mean. These are pretty standard, so if you know how to crochet, this won’t be hard to decipher:

  • ch – chain
  • sc – single chain
  • dec – decrease
  • * – beginning/end of a repeating part of the pattern


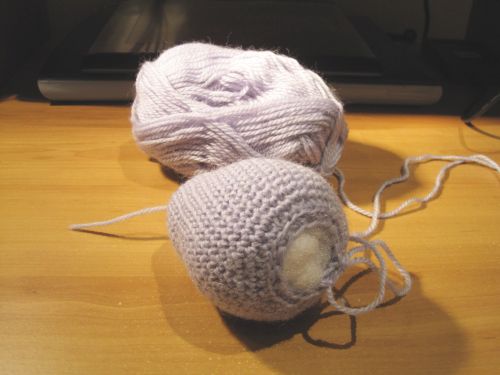
greytotoro1
 

Grey Totoro Body (Make 1, grey)

Rnd 1 – Ch 2, 6 sc in 2nd chain away from hook (Magic Ring method)
Rnd 2 – *2 sc in next stitch*, repeat 6 times (12 stitches)
Rnd 3 – *2 sc in next stitch, sc 1*, repeat 6 times (18 stitches)
Rnd 4 – *2 sc in next stitch, sc 2*, repeat 6 times (24 stitches)
Rnd 5 – *2 sc in next stitch, sc 3*, repeat 3 times (30 stitches)
Rnd 6 – 10 – sc (30 stitches)
Rnd 11 – *2 sc in next stitch, sc 6, 2 sc in next stitch, sc 7*, repeat 2 times (34 stitches)
Rnd 12 – sc (34 stitches)
Rnd 13 – *2 sc in next stitch, sc 8, 2 sc in next stitch, sc 7*, repeat 2 times (38 stitches)
Rnd 14 – 23 – sc (38 stitches)
Rnd 24 – *dec 1, sc3*, repeat 8 times (30 stitches)

Stuff the body now, and add 3 mm safety eyes
Rnd 25 – *dec 1 in back loops ONLY*, repeat 15 times (15 stitches)
Rnd 26 – *dec 1*, repeat 8 times (6 stitches)

Bind off, and thread the yarn through the top of the Totoro (if you can), so you can flatten the base. Using a sewing needle, sew a few white yarn stitches around the safety eyes. Then using black yarn, sew the nose on in-between the eyes, then sew the dot mouth on.


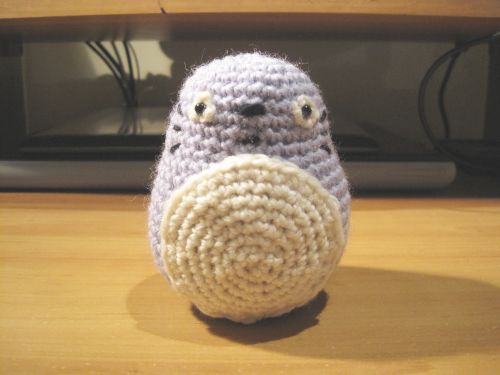
greytotoro2
 

Grey Totoro Belly (Make 1, white)

Rnd 1 – Ch 2, 6 sc in 2nd chain away from hook (Magic Ring method)
Rnd 2 – *2 sc in next stitch*, repeat 6 times (12 stitches)
Rnd 3 – *2 sc in next stitch, sc 1*, repeat 6 times (18 stitches)
Rnd 4 – *2 sc in next stitch, sc 2*, repeat 6 times (24 stitches)
Rnd 5 – *2 sc in next stitch, sc 3*, repeat 6 times (30 stitches)
Rnd 6 – *2 sc in next stitch, sc 4*, repeat 6 times (36 stitches)

Bind off, and sew the white belly onto the bottom front of the Totoro. Using blue yarn, sew seven “arrows” on its chest.


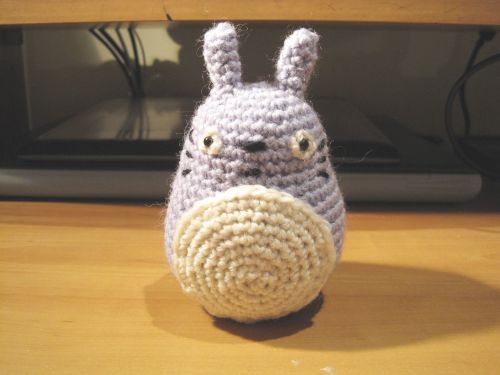
greytotoro3
 

Grey Totoro Ears (Make 2, grey)

Rnd 1 – Ch 2, 4 sc in 2nd chain away from hook (Magic Ring method)
Rnd 2 – *2 sc in next stitch, sc 1*, repeat 2 times (6 stitches)
Rnd 3 – 6 – sc (6 stitches)

Bind off, and sew onto the top of the head.


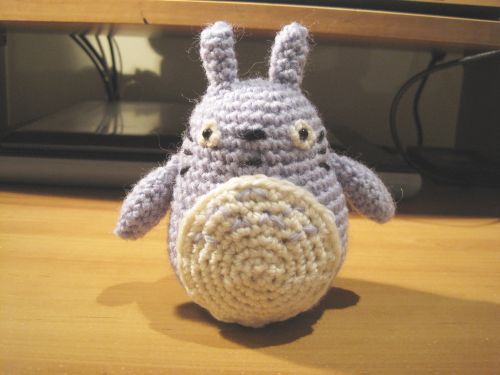
greytotoro4
 

Grey Totoro Arms and Tail (Make 3, grey)

Rnd 1 – Ch 2, 6 sc in 2nd chain away from hook (Magic Ring method)
Rnd 2 – *2 sc in next stitch, sc 1*, repeat 3 times (9 stitches)
Rnd 3 – *2 sc in next stitch, sc 2*, repeat 3 times (12 stitches)
Rnd 4 – 7 – sc (12 stitches)
Rnd 8 – *dec 1, sc1*, repeat 4 times (8 stitches)

Bind off, and stuff lightly for the arms. For the tail, stuff heavily. Sew onto the sides and back of the body.


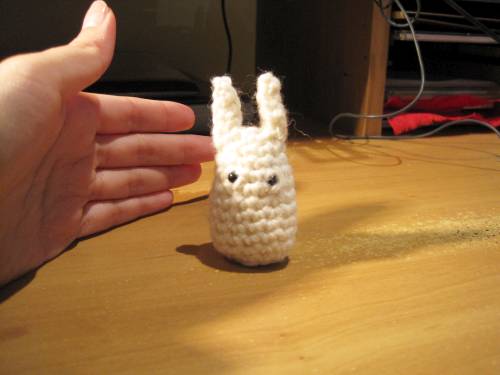
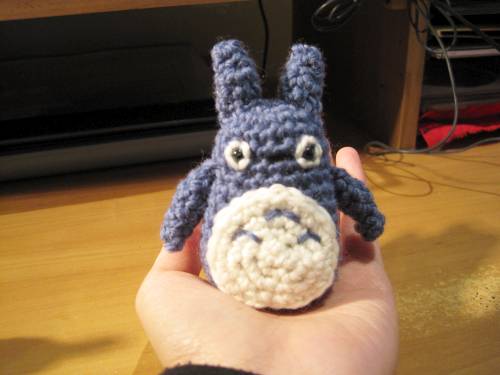
And here we have another 2 pics of the three Totoros!


alltotoro_walk
alltotoro_line
 

Blue and White Totoro – Free Crochet Pattern

This week I made good headway on Small Shen, and is halfway through Chapter 3 pencils. If you’re looking for some art updates from this last post I did, I did an interview on sigmatestudio.com where I showed some finished art samples from Chapter 1. Thanks to Stephen for the interview!

This week, I get to put up another free crochet pattern, adding to my budding pattern collection which so far includes the Red Angry Bird and the White Angry Bird. It’s a fan-favourite, the Blue and White Totoros from the seminal Studio Ghibli animations My Neighbour Totoro. If you’re a Hayao Miyazaki fan, you’ll know and love these furry critters. I also have the “large” grey Totoro pattern, which is here.


Totoros Fishing

My Neighbour Totoro, with Mei and Satsuki, the heroines.


These crochet patterns are quite small, and you can see the size of the Totoros in relation to my hand. The reason why they’re so small is because I don’t want to crochet large amigurumis, since they take up a lot of time. Since the giant grey Totoro is 38 stitches at its widest point, it makes sense that the smaller Totoros are… small. Either way, these won’t take long to do!

 
alltotoro
 

Blue and White Totoro Pattern

Here’s a list of what I used to make this crochet. It’s not a definite list, so feel free to use whatever you have, as long as it’s appropriate. It’s crocheted in the round, like most amigurumi, so only basic crochet skills are required.

NB. This pattern is created by me, so please give a link back to me if you want to use it or if you want to sell your crochet. Please give credit where it’s due. I should also that I don’t own the copyright to these characters – obviously Studio Ghibli does.

  • White, black and blue 8 ply yarn
  • 4mm crochet hook
  • Two pairs of 3mm black safety eyes – 6060 from Etsy is a good place to buy these
  • Large sewing needle, to sew the bits and pieces together


Crochet Abbreviations

Here are a list of the abbreviations I use, and what they mean. These are pretty standard, so if you know how to crochet, this won’t be hard to decipher:

  • ch – chain
  • sc – single chain
  • dec – decrease
  • * – beginning/end of a repeating part of the pattern


whitetotoro1
 

White Totoro Pattern

White Totoro Body (Make 1, white)

Rnd 1 – Ch 2, 6 sc in 2nd chain away from hook (Magic Ring method)
Rnd 2 – *2 sc in next stitch*, repeat 6 times (12 stitches)
Rnd 3-4 – sc (12 stitches)
Rnd 5 – *2 sc in next stitch, 3 sc*, repeat 3 times (15 stitches)
Rnd 6-9 – sc (15 stitches)

Stuff the body now, and add 3 mm safety eyes
Rnd 10 – *dec 1, 3 sc*, repeat 3 times (12 stitches)
Rnd 11 – *dec 1 through BACK loops only*, repeat 6 times (6 stitches)

Bind off, and using a sewing needle, sew a few white yarn stitches around the safety eyes.

 
whitetotoro
 

White Totoro Ears (Make 2, white)

Rnd 1 – Ch 5
Rnd 2 – sc, then ch 1
Rnd 3 – sc

Bind off, then using a sewing needle, sew the longer edges together to make a thin tube.Sew one end together, then sew the other end to the top of the Totoro, to make the long thin ears.


White Totoro Tail (Make 1, white)

Ch 2, 4 sc (Magic Ring method) and then sew onto the Totoro’s butt area.
Done right, this will help prop upBaby Totoro


bluetotoro1
 

Blue Totoro Pattern

Blue Totoro Body (Make 1, blue)

Rnd 1 – Ch 2, 6 sc in 2nd chain away from hook (Magic Ring method)
Rnd 2 – *2 sc in next stitch*, repeat 6 times (12 stitches)
Rnd 3 – *2 sc in next stitch, sc 1*, repeat 6 times (18 stitches)
Rnd 4 – 6 – sc (18 stitches)
Rnd 7 – *2 sc in next stitch, sc 5*, repeat 3 times (21 stitches)
Rnd 8 – *2 sc in next stitch, sc 6*, repeat 3 times (24 stitches)
Rnd 9 – 13 – sc (24 stitches)

Stuff the body now, and add 3 mm safety eyes
Rnd 14 – *dec 1 in back loops ONLY*, repeat 12 times (12 stitches)
Rnd 15 – *dec 1*, repeat 6 times (6 stitches)

Bind off, and thread the yarn through the Totoro. Using a sewing needle, sew a few white yarn stitches around the safety eyes. Then using black yarn, sew the nose on.


Belly (Make 1, white)

Rnd 1 – Ch 2, 6 sc in 2nd chain away from hook (Magic Ring method)
Rnd 2 – *2 sc in next stitch*, repeat 6 times (12 stitches)
Rnd 3 – *2 sc in next stitch, sc 1*, repeat 6 times (18 stitches)
Rnd 4 – *2 sc in next stitch, sc 2*, repeat 6 times (24 stitches)

Bind off, and sew the white belly onto the bottom front of the Totoro. Using blue yarn, sew three “arrows” on its chest.

 
bluetotoro
 

Blue Totoro Arms, Ears and Tail (Make 5, blue)

Rnd 1 – Ch 2, 4 sc in 2nd chain away from hook (Magic Ring method)
Rnd 2 – *2 sc in next stitch, sc 1*, repeat 2 times (6 stitches)
Rnd 3 – 6 – sc (6 stitches)
** For the arms, sc for two extra rows **

Bind off, and stuff with a small bit of stuffing. Sew the arms, ears and tail onto the proper places of the Totoro.


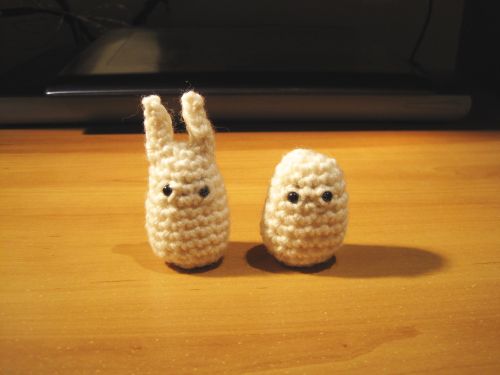
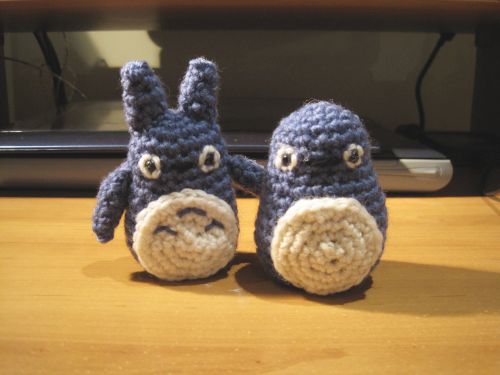
And Viola! Here you have the two small Totoros, next to my hand to show their sizes.

 
blue and white totoro
 

Recommendation: Nausicaa of the Valley of the Wind

I finally finished toning for the first third of Small Shen, and am taking a week off so I can work on a short story for a Bento Comics anthology. This month has really flown by… it’s 2012, but I’m wondering where all the time has gone.

I also noticed that I haven’t made a Recommendation for a while, so I’m recommending a no-brainer manga-but-not-quite today: Nausicaa of the Valley of the Wind.


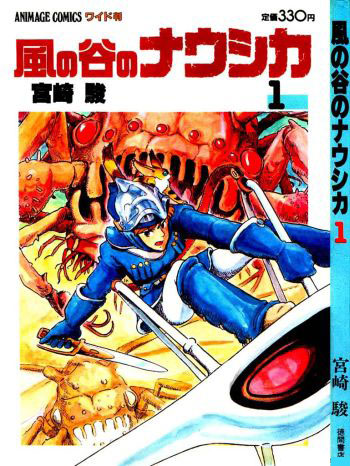
cover-nausicaa

Nausicaa of the Valley of the Wind (manga)
(1982-1994, Hayao Miyazaki)

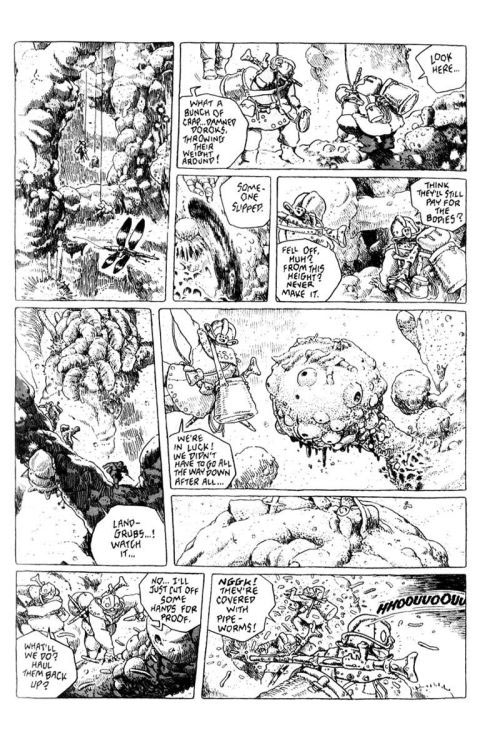
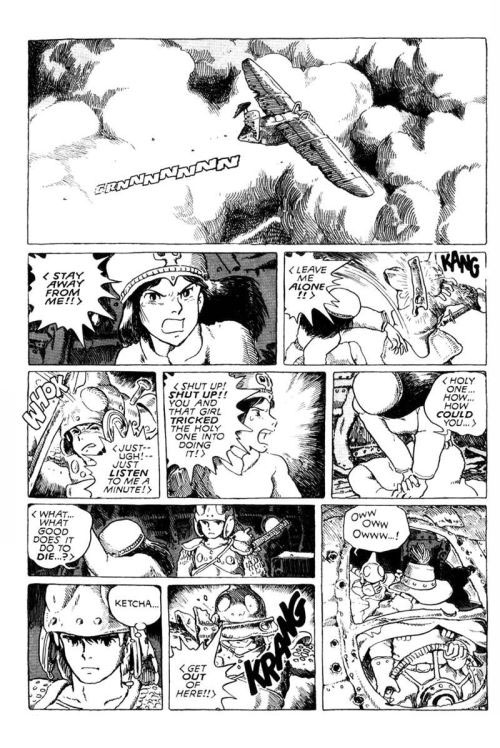
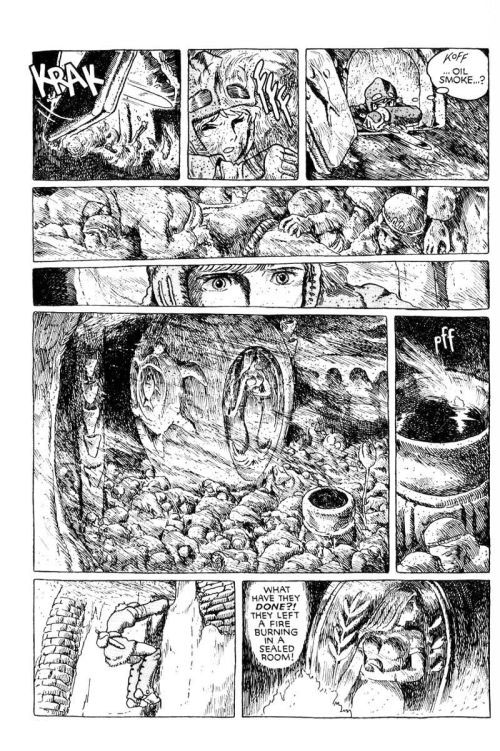
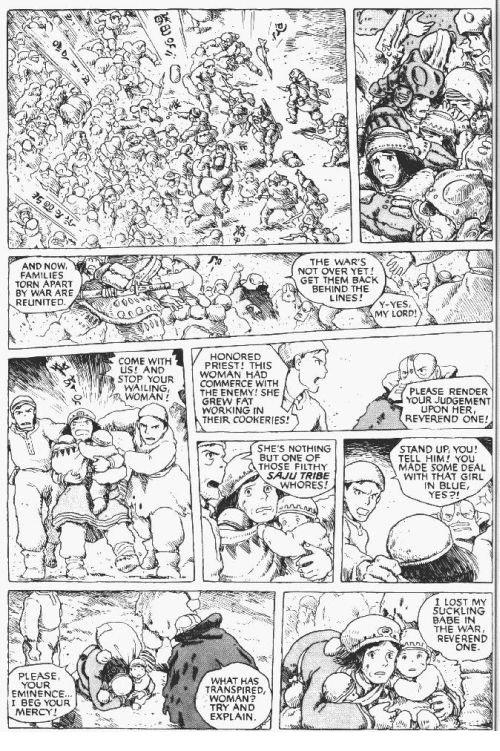
If you’re familiar with the work of Studio Ghibli, then you probably know that Nauscaa of the Valley of the Wind was the studio’s first full-length animated movie (a big success for the time). What many may not know is that the director of the film, Hayao Miyazaki, actually started the story as a serialised manga, and continued to write/draw the manga over a period of 12 years, long after the animated film was finished and screened. The end result is two separate stories that start the same, are different lengths, and also end vastly differently. Needless to say, due to the length of the manga, the themes tackled in it are alot more complex than it was in the animated film.


Plot
Nausicaa of the Valley of the Wind is set in a post-apocalyptic world, where massive pollution has rendered much of the air poisonous to humans, and giant insects ruled the world. What’s left of humanity huddle together in tiny pockets, constantly at war with each other and with the denizens of the insect world. Much of this world is covered by a gigantic, poisonous forest known as the Sea of Corruption, where much of the giant insects live, but where the humans need to don gas masks to survive.


In this setting lives the main character Nausicaa, who is the princess of a small coastal kingdom called the Valley of the Wind. The sea air protects this little hamlet from the poisonous air, but trouble comes when an aircraft full of refugees escaping from the powerful kingdom of Torumekia crashes near the Valley. The aircraft was carrying precious cargo – a stone that can activate a powerful biotech monster that the Torumekians were planning to use (possibly against their arch-enemies, the Doroks). When the stone comes into Nausicaa’s posession, she becomes drawn into the battle between the Torumekians and the Doroks, under the command of Princess Kushana of Torumekia.


Why I Recommend this Manga
Well, it’s Hayao Miyazaki’s work. What more can I say? The man has crafted a complex eco-fable here, a highly-enjoyable piece of science fiction irregardless of which side of the global-warming fence you’re from. Perhaps the biggest joy for me was to read more about the characters I knew as a child from the animated film, and appreciate how Miyazaki was able to carve two different-but-similar stories from the same mould, each being self-contained and with a satisfactory ending. For that reason, I suggest watching the 2-hour animated film first, then reading the manga. The manga fleshes out fully what the animated film cannot, due to time constraints.


Apart from the complex story, the art is also worth a big mention. Animators always make interesting manga artist, probably because their methodology of story-telling comes from a slightly different place from those who only draw manga. I find the sequential art of animators simultaneously more complex and simple than that of manga artists. By that, I mean that while their character and world designs tend to be more simple, the way they place their characters and the details they place in their environment tend to be more complex. Miyazaki’s work is a perfect example of this.

If you’re familiar with his style, then you’ll know the man’s not particularly great at drawing faces. He has a simple style that is adequate for distinguishing different people, but that’s about it. Where he truly excels, is in his backgrounds, which are present in nearly every panel. Animators-turned-manga-artists almost never do the “character floating in a void” thing that some manga artists do. There’s also the incredible detail on the planes, the machines, the dress, the flora and giant insects that inhabit this fantasy world. The characters don’t have an awful lot of complex clothing designs on them, but they’re designed in a way that lets you know, at a glance, what faction they’re from. Either way, I have no complaints about his art.


His story-telling is also worth mentioning, since there is so much stuff happening on each page that it hardly feels like a Japanese manga. Infact, his style seems more similar to European styles, where the cinematic quality is in the detail of the individual panels, not so much in the panel-to-panel transitions. This gives the feeling of an extremely-compressed story, which may take some time to get used to. While I wouldn’t do this kind of story-telling myself, I must mention that it’s not at all a bad thing, because it’s consistent. Miyazaki is a consistent story-teller, and while things may get confusing in action sequences, there’s never any mistake about where he’s heading with the story.

All-in-all, there isn’t much more praise I can heap on Hayao Miyazaki, whether his work is in film or on the page. It’s just a matter of find his work to read, in a form that does justice to the details in his artwork. My Nausicaa books is printed in A5 format, which is smaller than I recommend. This work was originally printed in A4 format, which I believe is the best format to read it in. If possible, I suggest you find the bigger size.