Pikachu – Free Crochet Pattern

I’m really flying through the pencils for Small Shen… I’m already near the end of Chapter 8. After that, it’s only Chapter 9 and the prologue, which is about 20 pages. After inking and toning, that’ll be the end of July, which is just in time for a Xmas release. WOW!

Then, what’s up next is… this.


pokemon
 

Anyway, this week, I get to do a pokemon crochet… of which many people have asked for. Previously, I thought Pikachu may have been too complicated to do, but it seems not. This wasn’t that much harder than some of the other crochets I’ve done. Either way, here’s Pikachu!!


Pikachu
 

Pikachu Pattern

Here’s a list of what I used to make this crochet. It’s not a definite list, so feel free to use whatever you have, as long as it’s appropriate. It’s crocheted in the round, like most amigurumi, so only basic crochet skills are required.

NB. This pattern is created by me, so please give a link back to me if you want to use it or if you want to sell your crochet. Please give credit where it’s due. I should also that I don’t own the copyright to these characters – obviously Studio Ghibli does.

  • Yellow, black, red and brown 8 ply yarn
  • 4mm crochet hook
  • Two pairs of 8mm black safety eyes – 6060 from Etsy is a good place to buy these
  • Large sewing needle, to sew the bits and pieces together


Crochet Abbreviations

Here are a list of the abbreviations I use, and what they mean. These are pretty standard, so if you know how to crochet, this won’t be hard to decipher:

  • ch – chain
  • sc – single chain
  • dec – decrease
  • * – beginning/end of a repeating part of the pattern


pikachu2
 

Pikachu Body (Make 1, yellow)

Rnd 1 – Ch 2, 6 sc in 2nd chain away from hook (Magic Ring method)
Rnd 2 – *2 sc in next stitch*, repeat 6 times (12 stitches)
Rnd 3 – *2 sc in next stitch, sc 1*, repeat 6 times (18 stitches)
Rnd 4 – *2 sc in next stitch, sc 2*, repeat 6 times (24 stitches)
Rnd 5 – *2 sc in next stitch, sc 3*, repeat 3 times (30 stitches)
Rnd 6 – 8 – sc (30 stitches)
Rnd 9 – *2 sc in next stitch, sc 4*, repeat 3 times (36 stitches)
Rnd 10 – sc (36 stitches)
Rnd 11 – *dec 1 in back loops ONLY*, repeat 18 times (18 stitches)
Rnd 12 – *2 sc in next stitch, sc 2*, repeat 6 times (24 stitches)
Rnd 13 – sc (24 stiches)
Rnd 14 – *2 sc in next stitch, sc 3*, repeat 3 times (30 stitches)
Rnd 15-22 – sc (30 stitches)

Stuff the body now, and add 8mm safety eyes
Rnd 23 – *dec 1 in back loops ONLY*, repeat 15 times (15 stitches)
Rnd 24 – *dec 1*, repeat 8 times (8 stitches)

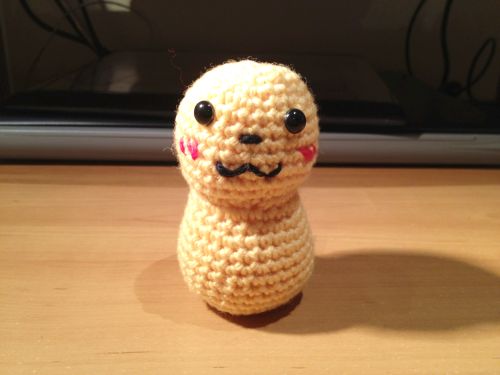
Bind off, and then sew the facial features onto Pikachu with black and red wool.


pikachu3
 

Pikachu Feet (Make 2, yellow)

Rnd 1 – Ch 2, 6 sc in 2nd chain away from hook (Magic Ring method)
Rnd 2 – *2 sc in next stitch*, repeat 6 times (12 stitches)
Rnd 3 – *2 sc in next stitch, sc 1*, repeat 6 times (18 stitches)
Rnd 4 – *2 sc in next stitch, sc 2*, repeat 6 times (24 stitches)

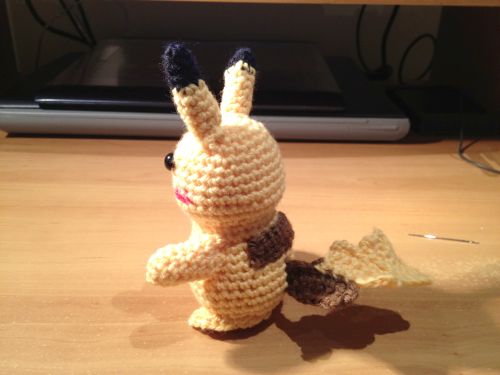
Fold each foot in half, and sew them together to make a semi-circle. Sew onto the bottom of the body to make the feet.


pikachu4
 

Pikachu Ears (Make 2, yellow, black)

Using black
Rnd 1 – Ch 2, 4 sc in 2nd chain away from hook (Magic Ring method)
Rnd 2 – *2 sc in next stitch, sc 1*, repeat 2 times (6 stitches)
Rnd 3 – *2 sc in next stitch, sc 1*, repeat 2 times (8 stitches)

Change to yellow
Rnd 4 – 10 – sc (8 stitches)

Bind off, stuff lightly, then sew onto the top of Pikachu’s head to make the ears.


pikachu5
 

Pikachu Hands (Make 2, yellow)

Rnd 1 – Ch 2, 6 sc in 2nd chain away from hook (Magic Ring method)
Rnd 2 – *2 sc in next stitch, sc 1*, repeat 3 times (9 stitches)
Rnd 3-7 – sc (9 stitches)

Bind off, stuff lightly, then sew onto the sides of Pikachu to make the arms.


pikachu6
 

Brown Strip on Back (Make 1, brown)

Rnd 1 – Ch 8 (8 stitches)
Rnd 2 – sc (8 stitches)

Bind off, then sew onto the back of Pikachu.


pikachu7
 

Pikachu Tail (Make 1, yellow, brown)

Rnd 1 – Ch 9 (8 stitches)
Rnd 2-4 – sc 8, then sc an additional 4 chains off the end of Rnd 4 (8 stitches)
Rnd 5 – sc 8 stitches (8 stitches)
Rnd 6-8 8 sc, then switch to brown. Then sc an additional 4 chains off the end of the last row (8 stitches)
Rnd 9 – sc 8 stitches (8 stitches)
Rnd 10-12 – sc

Bind off, then sew onto the bottom back of Pikachu to make the tail.

 
And Viola! You have a Pikachu to fit into the palm of your hand!
 

Grey Totoro – Free Crochet Pattern

Hi folks. This week my laptop is in the repair shop, so I’m sitting at a borrowed laptop while trying to plug the latest music single release from my friend Yunyu. It’s Dorothy (I wrote about the teaser trailer here), the first single from her Twisted Tales album, which is a music-manga collaboration between Yunyu and myself.

The official release date for Dorothy is 2nd March, 2012, but pop-culture sites Madman Entertainment, CoolShite and ToneDeaf has had an exclusive, early look at the full music video. You can click on the links I just wrote up, or you can wait until next Friday, when I do my full post on this project.

This week, as promised, I give you the grey Totoro pattern I had from 2 weeks ago. I have the blue and white Totoro patterns here, and given the way this is going, I guess I’ll have to create a new page for “free patterns” very soon.

 
All Totoro head


Grey Totoro Pattern

Here’s a list of what I used to make this crochet. It’s not a definite list, so feel free to use whatever you have, as long as it’s appropriate. It’s crocheted in the round, like most amigurumi, so only basic crochet skills are required.

NB. This pattern is created by me, so please give a link back to me if you want to use it or if you want to sell your crochet. Please give credit where it’s due. I should also that I don’t own the copyright to these characters – obviously Studio Ghibli does.

  • White, black and blue 8 ply yarn
  • 4mm crochet hook
  • Two pairs of 3mm black safety eyes – 6060 from Etsy is a good place to buy these
  • Large sewing needle, to sew the bits and pieces together


Crochet Abbreviations

Here are a list of the abbreviations I use, and what they mean. These are pretty standard, so if you know how to crochet, this won’t be hard to decipher:

  • ch – chain
  • sc – single chain
  • dec – decrease
  • * – beginning/end of a repeating part of the pattern


greytotoro1
 

Grey Totoro Body (Make 1, grey)

Rnd 1 – Ch 2, 6 sc in 2nd chain away from hook (Magic Ring method)
Rnd 2 – *2 sc in next stitch*, repeat 6 times (12 stitches)
Rnd 3 – *2 sc in next stitch, sc 1*, repeat 6 times (18 stitches)
Rnd 4 – *2 sc in next stitch, sc 2*, repeat 6 times (24 stitches)
Rnd 5 – *2 sc in next stitch, sc 3*, repeat 3 times (30 stitches)
Rnd 6 – 10 – sc (30 stitches)
Rnd 11 – *2 sc in next stitch, sc 6, 2 sc in next stitch, sc 7*, repeat 2 times (34 stitches)
Rnd 12 – sc (34 stitches)
Rnd 13 – *2 sc in next stitch, sc 8, 2 sc in next stitch, sc 7*, repeat 2 times (38 stitches)
Rnd 14 – 23 – sc (38 stitches)
Rnd 24 – *dec 1, sc3*, repeat 8 times (30 stitches)

Stuff the body now, and add 3 mm safety eyes
Rnd 25 – *dec 1 in back loops ONLY*, repeat 15 times (15 stitches)
Rnd 26 – *dec 1*, repeat 8 times (6 stitches)

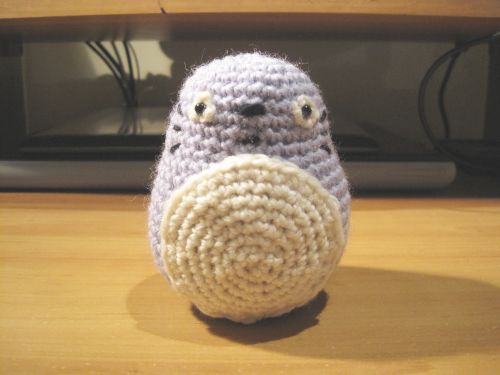
Bind off, and thread the yarn through the top of the Totoro (if you can), so you can flatten the base. Using a sewing needle, sew a few white yarn stitches around the safety eyes. Then using black yarn, sew the nose on in-between the eyes, then sew the dot mouth on.


greytotoro2
 

Grey Totoro Belly (Make 1, white)

Rnd 1 – Ch 2, 6 sc in 2nd chain away from hook (Magic Ring method)
Rnd 2 – *2 sc in next stitch*, repeat 6 times (12 stitches)
Rnd 3 – *2 sc in next stitch, sc 1*, repeat 6 times (18 stitches)
Rnd 4 – *2 sc in next stitch, sc 2*, repeat 6 times (24 stitches)
Rnd 5 – *2 sc in next stitch, sc 3*, repeat 6 times (30 stitches)
Rnd 6 – *2 sc in next stitch, sc 4*, repeat 6 times (36 stitches)

Bind off, and sew the white belly onto the bottom front of the Totoro. Using blue yarn, sew seven “arrows” on its chest.


greytotoro3
 

Grey Totoro Ears (Make 2, grey)

Rnd 1 – Ch 2, 4 sc in 2nd chain away from hook (Magic Ring method)
Rnd 2 – *2 sc in next stitch, sc 1*, repeat 2 times (6 stitches)
Rnd 3 – 6 – sc (6 stitches)

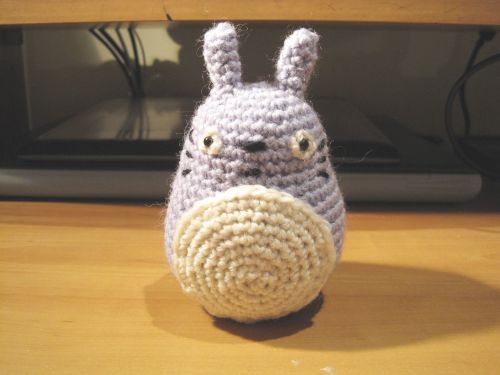
Bind off, and sew onto the top of the head.


greytotoro4
 

Grey Totoro Arms and Tail (Make 3, grey)

Rnd 1 – Ch 2, 6 sc in 2nd chain away from hook (Magic Ring method)
Rnd 2 – *2 sc in next stitch, sc 1*, repeat 3 times (9 stitches)
Rnd 3 – *2 sc in next stitch, sc 2*, repeat 3 times (12 stitches)
Rnd 4 – 7 – sc (12 stitches)
Rnd 8 – *dec 1, sc1*, repeat 4 times (8 stitches)

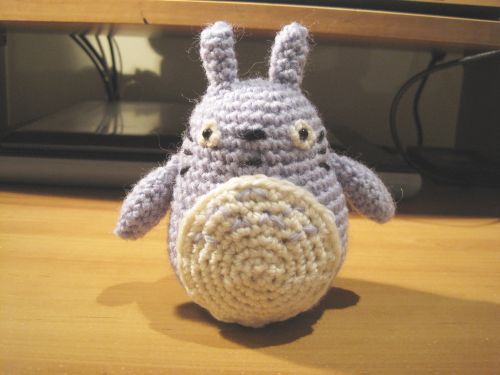
Bind off, and stuff lightly for the arms. For the tail, stuff heavily. Sew onto the sides and back of the body.


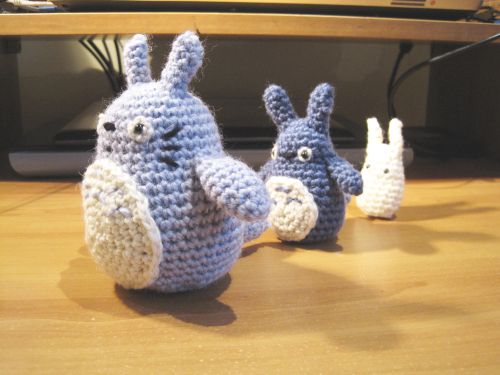
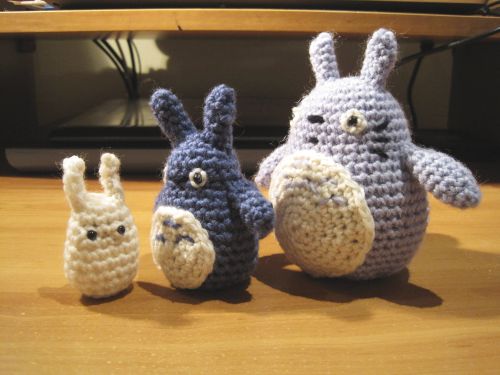
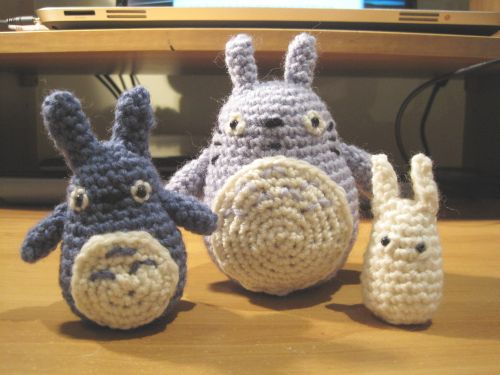
And here we have another 2 pics of the three Totoros!


alltotoro_walk
alltotoro_line
 

Blue and White Totoro – Free Crochet Pattern

This week I made good headway on Small Shen, and is halfway through Chapter 3 pencils. If you’re looking for some art updates from this last post I did, I did an interview on sigmatestudio.com where I showed some finished art samples from Chapter 1. Thanks to Stephen for the interview!

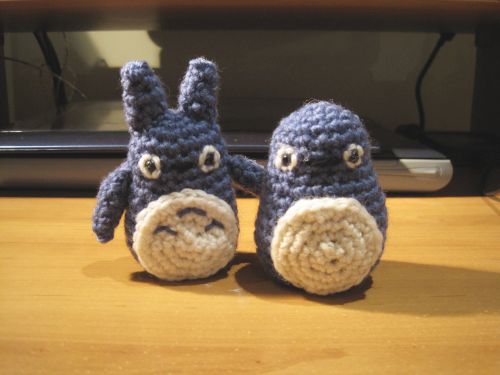
This week, I get to put up another free crochet pattern, adding to my budding pattern collection which so far includes the Red Angry Bird and the White Angry Bird. It’s a fan-favourite, the Blue and White Totoros from the seminal Studio Ghibli animations My Neighbour Totoro. If you’re a Hayao Miyazaki fan, you’ll know and love these furry critters. I also have the “large” grey Totoro pattern, which is here.


Totoros Fishing

My Neighbour Totoro, with Mei and Satsuki, the heroines.


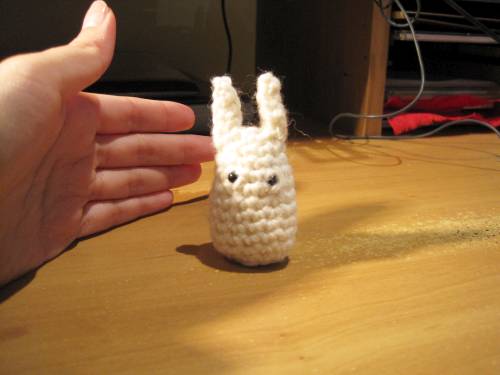
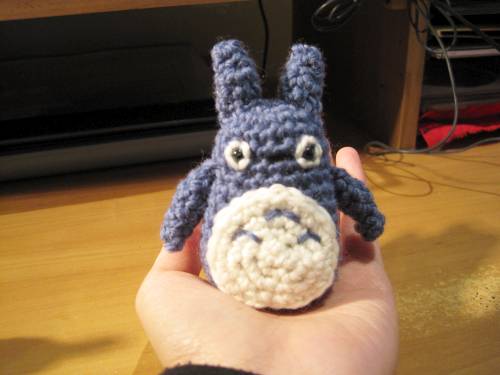
These crochet patterns are quite small, and you can see the size of the Totoros in relation to my hand. The reason why they’re so small is because I don’t want to crochet large amigurumis, since they take up a lot of time. Since the giant grey Totoro is 38 stitches at its widest point, it makes sense that the smaller Totoros are… small. Either way, these won’t take long to do!

 
alltotoro
 

Blue and White Totoro Pattern

Here’s a list of what I used to make this crochet. It’s not a definite list, so feel free to use whatever you have, as long as it’s appropriate. It’s crocheted in the round, like most amigurumi, so only basic crochet skills are required.

NB. This pattern is created by me, so please give a link back to me if you want to use it or if you want to sell your crochet. Please give credit where it’s due. I should also that I don’t own the copyright to these characters – obviously Studio Ghibli does.

  • White, black and blue 8 ply yarn
  • 4mm crochet hook
  • Two pairs of 3mm black safety eyes – 6060 from Etsy is a good place to buy these
  • Large sewing needle, to sew the bits and pieces together


Crochet Abbreviations

Here are a list of the abbreviations I use, and what they mean. These are pretty standard, so if you know how to crochet, this won’t be hard to decipher:

  • ch – chain
  • sc – single chain
  • dec – decrease
  • * – beginning/end of a repeating part of the pattern


whitetotoro1
 

White Totoro Pattern

White Totoro Body (Make 1, white)

Rnd 1 – Ch 2, 6 sc in 2nd chain away from hook (Magic Ring method)
Rnd 2 – *2 sc in next stitch*, repeat 6 times (12 stitches)
Rnd 3-4 – sc (12 stitches)
Rnd 5 – *2 sc in next stitch, 3 sc*, repeat 3 times (15 stitches)
Rnd 6-9 – sc (15 stitches)

Stuff the body now, and add 3 mm safety eyes
Rnd 10 – *dec 1, 3 sc*, repeat 3 times (12 stitches)
Rnd 11 – *dec 1 through BACK loops only*, repeat 6 times (6 stitches)

Bind off, and using a sewing needle, sew a few white yarn stitches around the safety eyes.

 
whitetotoro
 

White Totoro Ears (Make 2, white)

Rnd 1 – Ch 5
Rnd 2 – sc, then ch 1
Rnd 3 – sc

Bind off, then using a sewing needle, sew the longer edges together to make a thin tube.Sew one end together, then sew the other end to the top of the Totoro, to make the long thin ears.


White Totoro Tail (Make 1, white)

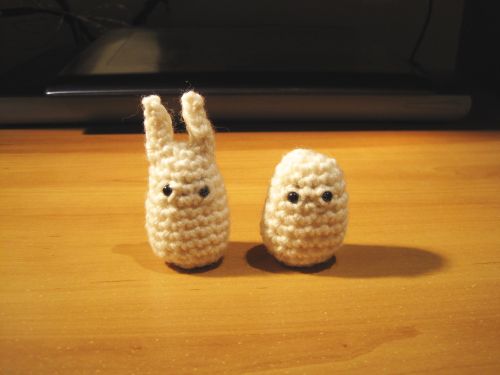
Ch 2, 4 sc (Magic Ring method) and then sew onto the Totoro’s butt area.
Done right, this will help prop upBaby Totoro


bluetotoro1
 

Blue Totoro Pattern

Blue Totoro Body (Make 1, blue)

Rnd 1 – Ch 2, 6 sc in 2nd chain away from hook (Magic Ring method)
Rnd 2 – *2 sc in next stitch*, repeat 6 times (12 stitches)
Rnd 3 – *2 sc in next stitch, sc 1*, repeat 6 times (18 stitches)
Rnd 4 – 6 – sc (18 stitches)
Rnd 7 – *2 sc in next stitch, sc 5*, repeat 3 times (21 stitches)
Rnd 8 – *2 sc in next stitch, sc 6*, repeat 3 times (24 stitches)
Rnd 9 – 13 – sc (24 stitches)

Stuff the body now, and add 3 mm safety eyes
Rnd 14 – *dec 1 in back loops ONLY*, repeat 12 times (12 stitches)
Rnd 15 – *dec 1*, repeat 6 times (6 stitches)

Bind off, and thread the yarn through the Totoro. Using a sewing needle, sew a few white yarn stitches around the safety eyes. Then using black yarn, sew the nose on.


Belly (Make 1, white)

Rnd 1 – Ch 2, 6 sc in 2nd chain away from hook (Magic Ring method)
Rnd 2 – *2 sc in next stitch*, repeat 6 times (12 stitches)
Rnd 3 – *2 sc in next stitch, sc 1*, repeat 6 times (18 stitches)
Rnd 4 – *2 sc in next stitch, sc 2*, repeat 6 times (24 stitches)

Bind off, and sew the white belly onto the bottom front of the Totoro. Using blue yarn, sew three “arrows” on its chest.

 
bluetotoro
 

Blue Totoro Arms, Ears and Tail (Make 5, blue)

Rnd 1 – Ch 2, 4 sc in 2nd chain away from hook (Magic Ring method)
Rnd 2 – *2 sc in next stitch, sc 1*, repeat 2 times (6 stitches)
Rnd 3 – 6 – sc (6 stitches)
** For the arms, sc for two extra rows **

Bind off, and stuff with a small bit of stuffing. Sew the arms, ears and tail onto the proper places of the Totoro.


And Viola! Here you have the two small Totoros, next to my hand to show their sizes.

 
blue and white totoro
 

White Angry Bird – Free Crochet Pattern

A whole bunch of stuff is happening this December, and I find myself quite busy this festive season. I’m working on the inks for Chapters 1-2 for Small Shen, so that’s the bulk of my main work. I’m also working on a music-art collaboration project with a musician friend, the first release of which is due Jan 31st 2012, so that has been penned in on my timetable. On top of that, I have a bunch of crochet stuff to do, and the kind of odds and ends that crop up at the end of the year. Will I accomplish anything by December 31st?!

I finally deleted my old Livejournal account. Managing it is a bit too much, since it’s no longer active.

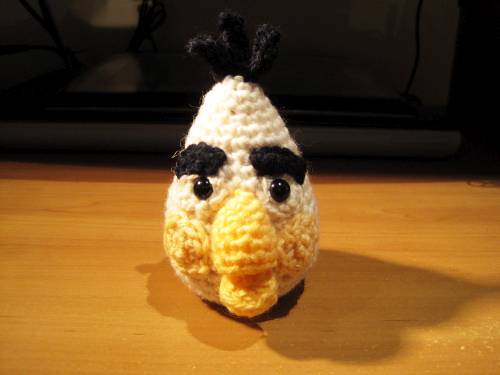
This week, I get to post up my free crochet pattern of the White Angry Bird. For those who are living underneath a rock, Angry Birds is a highly popular casual game that involves throwing a bunch of cute-but-furious cartoon birds at a bunch of greedy pigs, who have stolen the birds’ eggs. The “mascot” of the series is the Angry Red Bird, and this week he’s joined by his friend, the Angry White Bird.


Get the free Angry Red Bird crochet pattern here.

 
Important: People have asked me for more Angry Bird patterns, but I’m afraid I can’t promise anything, since these characters are copyrighted. I provide these patterns for free because it’s all in good fun, but the original copyright owners must be respected – and I don’t have any other Angry Bird patterns either. If you’re looking for the green bird, the black bomb bird, or the green pig, you can register on the site Ravelry.com and find them there. No word on the yellow or blue Angry Bird.

That said, if you like this pattern, please support Angry Birds and buy the game, or the game-related merchandise.


Angry White Bird
Here’s the Angry White Bird with the Angry Red Bird. Friends!


Angry White Bird Pattern

Here’s a list of what I used to make this crochet. It’s not a definite list, so feel free to use whatever you have, as long as it’s appropriate. It’s crocheted in the round, like most amigurumi, so only basic crochet skills are required.

NB. This pattern is created by me, so please give a link back to me if you want to use it or if you want to sell your crochet. Please give credit where it’s due.

  • White, dark yellow, light yellow, and black 8 ply yarn
  • 4mm crochet hook
  • 8mm black safety eyes – 6060 from Etsy is a good place to buy these
  • Large sewing needle, to sew the bits and pieces together


Crochet Abbreviations

Here are a list of the abbreviations I use, and what they mean. These are pretty standard, so if you know how to crochet, this won’t be hard to decipher:

  • ch – chain
  • sc – single chain
  • dec – decrease
  • * – beginning/end of a repeating part of the pattern


White Bird 1
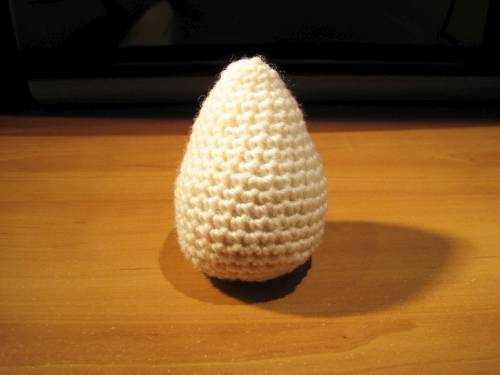
The round, egg like appearance of the White Bird


Body (Make 1, white)

Rnd 1 – Ch 2, 6 single chain (sc) in 2nd chain away from hook (Magic Ring method)
Rnd 2 – 2 sc in each chain (12 stitches)
Rnd 3 – *2 sc in next single chain, 1 sc*, repeat 6 times (18 stitches)
Rnd 4-5 – sc
Rnd 6 – *2 sc in next single chain, 2 sc*, repeat 6 times (24 stitches)
Rnd 7-9 – sc
Rnd 10 – *2 sc in next single chain, 3 sc*, repeat 6 times (30 stitches)
Rnd 11-16 – sc
Rnd 17 – *decrease (dec) 1, 3 sc*, repeat 6 times (24 stitches)
Rnd 18 – sc

Start stuffing the body, and sew the eyes onto the face.
Rnd 19 – *dec 1 through back loops ONLY*, repeat 6 times (12 stitches)
Rnd 20 – *dec 1* repeat 6 times (6 stitches)

Fasten off, then use a needle to weave in loose ends.


White Bird 2
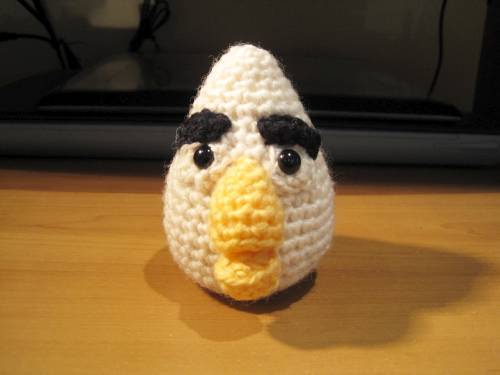
The eyes and the eyebrows… so different yet similar to the Red Bird’s.


Eyes and Eyebrows (Make 2 of each, black and white)

Make the two eyes with white yarn
Rnd 1 – Ch 2, 6 sc in 2nd chain away from hook (Magic Ring method)
Rnd 2 – 3 sc

Fasten off, then use an 8mm safety eye to pin it on the body, making sure the longer part is on the outside of the eyes.
Then use a sewing needle to sew the white eyes properly onto the body.


Make the two eyebrows with black yarn
Rnd 1 – Ch 6, turn
Rnd 2 – 4 sc

Fasten off, sew onto the body on top of the eyes.


White Bird 3
It has a significantly bigger beak than the Red Angry Bird.


Top Beak (Make 1, dark yellow)

Rnd 1 – Ch 2, 4 sc in 2nd chain away from hook (Magic Ring method)
Rnd 2 – *2 sc in next single chain*, repeat 4 times (8 stitches)
Rnd 3 – sc
Rnd 4 – *2 sc in next single chain, 3 sc*, repeat twice (10 stitches)
Rnd 5-7 – sc
Rnd 8 – *dec 1 through back loops ONLY*, repeat 5 times (5 stitches)

Fasten off, stuff and sew onto the body between the eyes, leaving space for the bottom half of the beak


Bottom Beak (Make 1, dark yellow)
Rnd 1 – Ch 2, 4 sc in 2nd chain away from hook (Magic Ring method)
Rnd 2 – *2 sc in next single chain*, repeat 4 times (8 stitches)
Rnd 3 – *2 sc in next single chain, 3 sc*, repeat twice (10 stitches)
Rnd 4 – *dec 1 through back loops ONLY*, repeat 5 times (5 stitches)

Fasten off, stuff and sew onto the body under the top beak.
Don’t sew the bottom and top beaks together since it’ll turn into a big yellow blob, so just sew the corners of the beaks together to get that slack-jawed look.


Whtie Bird 4
Where you add the rest of it on


Yellow Cheeks (Make 2, light yellow)
Rnd 1 – Ch 2, 6 single chain (sc) in 2nd chain away from hook (Magic Ring method)
Rnd 2 – 2 sc in each chain (12 stitches)

Fasten off, stuff and sew onto the cheeks, under the eyes


Black Hair (Make 3, black)

Rnd 1 – Ch 4, turn
Rnd 2 – 3 sc, turn
Rnd 3 – 3 sc

Fasten off, then sew into a small tube. Sew onto the top of the head.