White Angry Bird – Free Crochet Pattern

A whole bunch of stuff is happening this December, and I find myself quite busy this festive season. I’m working on the inks for Chapters 1-2 for Small Shen, so that’s the bulk of my main work. I’m also working on a music-art collaboration project with a musician friend, the first release of which is due Jan 31st 2012, so that has been penned in on my timetable. On top of that, I have a bunch of crochet stuff to do, and the kind of odds and ends that crop up at the end of the year. Will I accomplish anything by December 31st?!

I finally deleted my old Livejournal account. Managing it is a bit too much, since it’s no longer active.

This week, I get to post up my free crochet pattern of the White Angry Bird. For those who are living underneath a rock, Angry Birds is a highly popular casual game that involves throwing a bunch of cute-but-furious cartoon birds at a bunch of greedy pigs, who have stolen the birds’ eggs. The “mascot” of the series is the Angry Red Bird, and this week he’s joined by his friend, the Angry White Bird.


Get the free Angry Red Bird crochet pattern here.

 
Important: People have asked me for more Angry Bird patterns, but I’m afraid I can’t promise anything, since these characters are copyrighted. I provide these patterns for free because it’s all in good fun, but the original copyright owners must be respected – and I don’t have any other Angry Bird patterns either. If you’re looking for the green bird, the black bomb bird, or the green pig, you can register on the site Ravelry.com and find them there. No word on the yellow or blue Angry Bird.

That said, if you like this pattern, please support Angry Birds and buy the game, or the game-related merchandise.


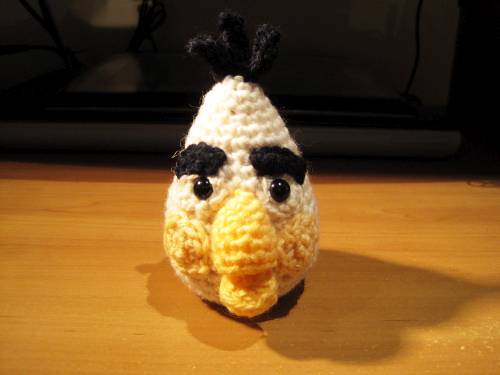
Angry White Bird
Here’s the Angry White Bird with the Angry Red Bird. Friends!


Angry White Bird Pattern

Here’s a list of what I used to make this crochet. It’s not a definite list, so feel free to use whatever you have, as long as it’s appropriate. It’s crocheted in the round, like most amigurumi, so only basic crochet skills are required.

NB. This pattern is created by me, so please give a link back to me if you want to use it or if you want to sell your crochet. Please give credit where it’s due.

  • White, dark yellow, light yellow, and black 8 ply yarn
  • 4mm crochet hook
  • 8mm black safety eyes – 6060 from Etsy is a good place to buy these
  • Large sewing needle, to sew the bits and pieces together


Crochet Abbreviations

Here are a list of the abbreviations I use, and what they mean. These are pretty standard, so if you know how to crochet, this won’t be hard to decipher:

  • ch – chain
  • sc – single chain
  • dec – decrease
  • * – beginning/end of a repeating part of the pattern


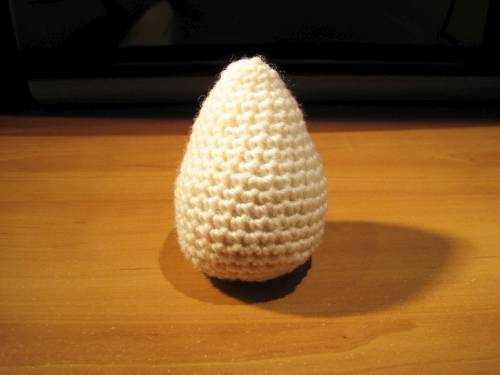
White Bird 1
The round, egg like appearance of the White Bird


Body (Make 1, white)

Rnd 1 – Ch 2, 6 single chain (sc) in 2nd chain away from hook (Magic Ring method)
Rnd 2 – 2 sc in each chain (12 stitches)
Rnd 3 – *2 sc in next single chain, 1 sc*, repeat 6 times (18 stitches)
Rnd 4-5 – sc
Rnd 6 – *2 sc in next single chain, 2 sc*, repeat 6 times (24 stitches)
Rnd 7-9 – sc
Rnd 10 – *2 sc in next single chain, 3 sc*, repeat 6 times (30 stitches)
Rnd 11-16 – sc
Rnd 17 – *decrease (dec) 1, 3 sc*, repeat 6 times (24 stitches)
Rnd 18 – sc

Start stuffing the body, and sew the eyes onto the face.
Rnd 19 – *dec 1 through back loops ONLY*, repeat 6 times (12 stitches)
Rnd 20 – *dec 1* repeat 6 times (6 stitches)

Fasten off, then use a needle to weave in loose ends.


White Bird 2
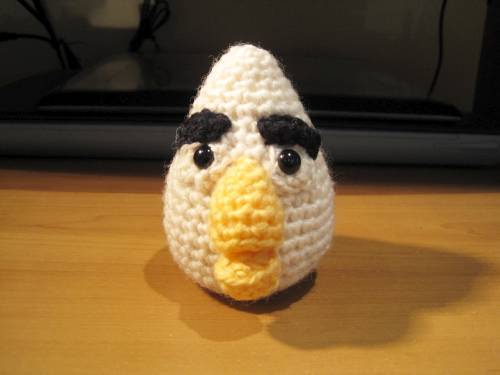
The eyes and the eyebrows… so different yet similar to the Red Bird’s.


Eyes and Eyebrows (Make 2 of each, black and white)

Make the two eyes with white yarn
Rnd 1 – Ch 2, 6 sc in 2nd chain away from hook (Magic Ring method)
Rnd 2 – 3 sc

Fasten off, then use an 8mm safety eye to pin it on the body, making sure the longer part is on the outside of the eyes.
Then use a sewing needle to sew the white eyes properly onto the body.


Make the two eyebrows with black yarn
Rnd 1 – Ch 6, turn
Rnd 2 – 4 sc

Fasten off, sew onto the body on top of the eyes.


White Bird 3
It has a significantly bigger beak than the Red Angry Bird.


Top Beak (Make 1, dark yellow)

Rnd 1 – Ch 2, 4 sc in 2nd chain away from hook (Magic Ring method)
Rnd 2 – *2 sc in next single chain*, repeat 4 times (8 stitches)
Rnd 3 – sc
Rnd 4 – *2 sc in next single chain, 3 sc*, repeat twice (10 stitches)
Rnd 5-7 – sc
Rnd 8 – *dec 1 through back loops ONLY*, repeat 5 times (5 stitches)

Fasten off, stuff and sew onto the body between the eyes, leaving space for the bottom half of the beak


Bottom Beak (Make 1, dark yellow)
Rnd 1 – Ch 2, 4 sc in 2nd chain away from hook (Magic Ring method)
Rnd 2 – *2 sc in next single chain*, repeat 4 times (8 stitches)
Rnd 3 – *2 sc in next single chain, 3 sc*, repeat twice (10 stitches)
Rnd 4 – *dec 1 through back loops ONLY*, repeat 5 times (5 stitches)

Fasten off, stuff and sew onto the body under the top beak.
Don’t sew the bottom and top beaks together since it’ll turn into a big yellow blob, so just sew the corners of the beaks together to get that slack-jawed look.


Whtie Bird 4
Where you add the rest of it on


Yellow Cheeks (Make 2, light yellow)
Rnd 1 – Ch 2, 6 single chain (sc) in 2nd chain away from hook (Magic Ring method)
Rnd 2 – 2 sc in each chain (12 stitches)

Fasten off, stuff and sew onto the cheeks, under the eyes


Black Hair (Make 3, black)

Rnd 1 – Ch 4, turn
Rnd 2 – 3 sc, turn
Rnd 3 – 3 sc

Fasten off, then sew into a small tube. Sew onto the top of the head.

Angry Birds – Free Crochet Pattern

Well, Small Shen is chugging along and nearing the end of Chapter 2 (after that, inking this third of the book). Meanwhile, I got quite involved with my crocheting, making a fair number of amigurumi (small crocheted plush toys). I’ve been making attempts to come up with my own patterns, and now that I’ve finally succeeded, I’m proudly showing them off on this blog!

This free pattern is of the angry red bird from Angry Birds, a very popular casual game I played for a little while back. The objective of the game is to catapult a bunch of cute-but-furious birds at a bunch of green pig enemies, who have stolen the eggs of the birds. It’s a better-than-most catapult game, and the super-cute and eye-catching designs just made it very endearing. As you can see, the birds are a very big part of the game’s appeal:


Angry Birds - Original Picture

What the original Angry Red Bird looks like.


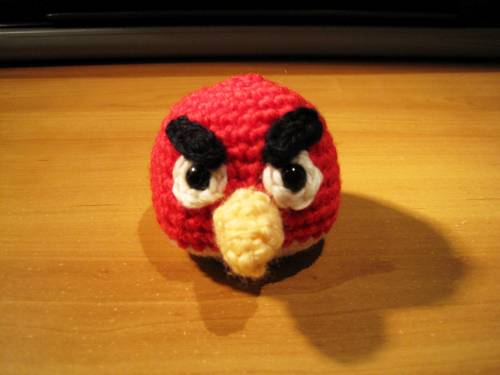
And here is what my Angry Red Bird crochet looks like. I put it on my hand, so you can see the relative size of the finished amigurumi. I prefer to make smaller amigurumi, so this one’s on the smaller size, but I find the projects easier and faster to finish, which has its good points.


Get the free Angry White Bird Pattern here
 

Angry Bird - Finished

My version of the Angry Red Bird character.


Angry Red Bird Pattern

Here’s a list of what I used to make this crochet. It’s not a definite list, so feel free to use whatever you have, as long as it’s appropriate. It’s crocheted in the round, like most amigurumi, so only basic crochet skills are required.

NB. This pattern is created by me, so please give a link back to me if you want to use it or if you want to sell your crochet. Please give credit where it’s due.

  • Red, white, black and yellow 8 ply yarn
  • 4mm crochet hook
  • 8mm black safety eyes – 6060 from Etsy is a good place to buy these
  • Large sewing needle, to sew the bits and pieces together


Crochet Abbreviations

Here are a list of the abbreviations I use, and what they mean. These are pretty standard, so if you know how to crochet, this won’t be hard to decipher:

  • ch – chain
  • sc – single chain
  • dec – decrease
  • * – beginning/end of a repeating part of the pattern


Angry Bird 1

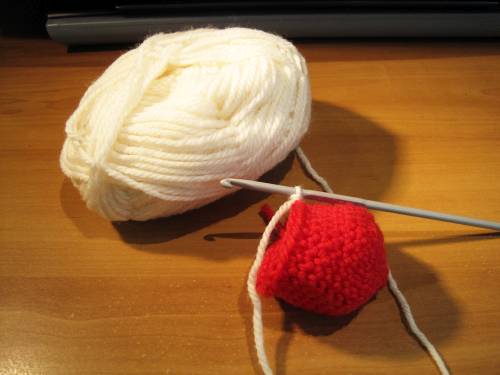
Crocheting the bird's body in red yarn.

 
Body (Make 1, red and white)

With red yarn
Rnd 1 – Ch 2, 6 single chain (sc) in 2nd chain away from hook (Magic Ring method)
Rnd 2 – 2 sc in each chain (12 stitches)
Rnd 3 – *2 sc in next single chain, 1 sc*, repeat 6 times (18 stitches)
Rnd 4 – *2 sc in next single chain, 2 sc*, repeat 6 times (24 stitches)
Rnd 5 – *2 sc in next single chain, 3 sc*, repeat 6 times (30 stitches)
Rnd 6-11 – sc

Change to white yarn
Rnd 12 – sc
Rnd 13 – *decrease (dec) 1, 3 sc*, repeat 6 times (24 stitches)
Rnd 14 – sc

Start stuffing the body, and sew the eyes onto the body at this point
Rnd 15 – *dec 1 through back loops ONLY*, repeat 6 times (12 stitches)
Rnd 16 – *dec 1* repeat 6 times (6 stitches)

Fasten off, then use a needle to weave in loose ends.


Angry Bird 2

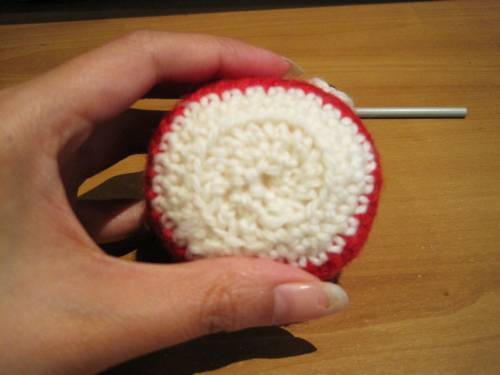
What the bottom of the bird should look like.


Eyes and Eyebrows (Make 2 of each, black and white)

Make the two eyes with white yarn
Rnd 1 – Ch 2, 6 sc in 2nd chain away from hook (Magic Ring method)

Fasten off, then use an 8mm safety eye to pin the two white eyes on the body
Then use a sewing needle to sew the white eyes properly onto the red body.


Angry Bird 3

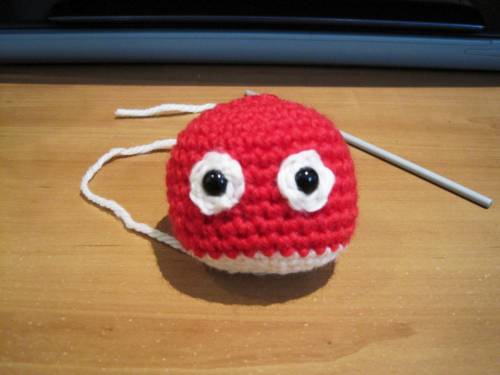
Sewing the eyes onto the body, after you pin the safety eyes onto the body.


Make the two eyebrows with black yarn
Rnd 1 – Ch 6, turn
Rnd 2 – 4 sc

Fasten off, sew onto the body on top of the eyes


Beak (Make 1, yellow)

Rnd 1 – Ch 2, 4 sc in 2nd chain away from hook (Magic Ring method)
Rnd 2 – sc
Rnd 3 – *2 sc in next single chain, 1 sc*, repeat twice (6 stitches)
Rnd 4 – *2 sc in next single chain, 2 sc*, repeat twice (8 stitches)
Rnd 5 – *2 sc in next single chain, 3 sc*, repeat twice (10 stitches)

Fasten off, stuff and sew onto the body between the eyes


Angry Bird 4

Sewed the beak and eyebrows onto the body.


Red Hair on Head (Make 1 big, 1 small, red yarn)

Making the Bigger Hair
Rnd 1 – Ch 2, 4 sc in 2nd chain away from hook (Magic Ring method)
Rnd 2 – *2 sc in next single chain, 1 sc*, repeat 2 twice (6 stitches)
Rnd 3-5 – sc, then fasten off

Making the Smaller Hair
Rnd 1 – Ch 2, 4 sc in 2nd chain away from hook (Magic Ring method)
Rnd 2-3 – sc

Fasten off, then sew both hairs onto the top of the body.


And viola! All done!

Bumble Bee Amigurumi

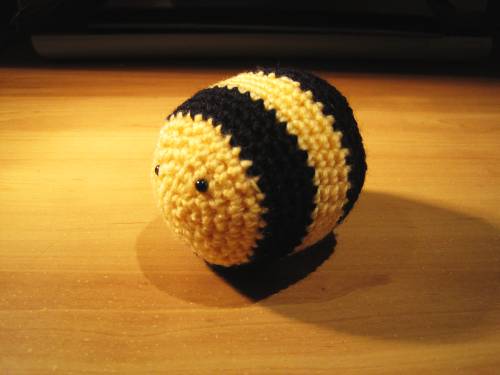
I’ve started on Small Shen, which should be due next year in July (probably in time for a Christmas release). We shall see how it goes! Also, I’ve got a bumblebee crochet here, from a pattern kindly placed online by the Curious Crochet blog. Isn’t it cute?


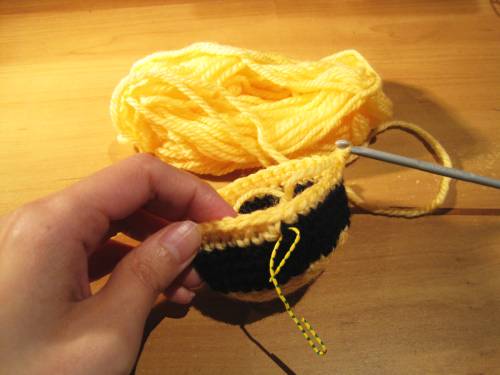
Step 1: Start making the striped body. Learned to change colours in a single crochet body here.


Step 2: Added little black eyes... these were the first beady safety eyes I bought, and I'm glad I still have a use for them.... as they were actually too small!


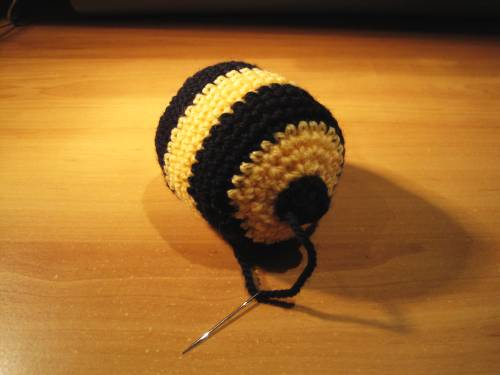
Step 3: Sewed the stinger on. Almost made a mess out of this, as the stinger was so small it was hard to crochet.


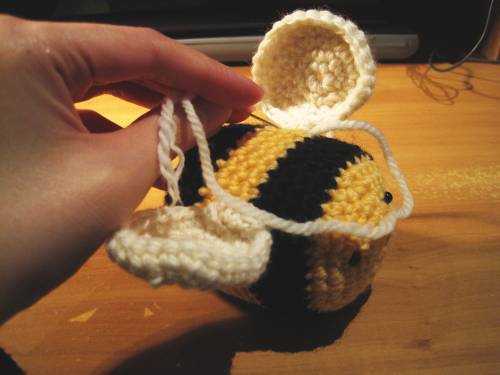
Step 4: Crocheted the wings, and sewed the onto the body.


Here’s a pic of the finished Bumble Bee Amigurumi:


Bumble Bee Amigurumi

Peanut Bear

I’m back from NYCC and trying to recover from what was really a very long trip. Due to some mix-up with the table listing, the “Bento Comics” booth didn’t end up being listed under our name at NYAF, so I guess that may have confused a few people if they didn’t spot the “Bento Comics” booth in the Anime Festival’s artist alley, at least on the map. We did some good sales nonetheless, so better luck next time.


NYCC 2011

A shot of one of the entrances of NYCC 2011. It was crazy, with so many people going!

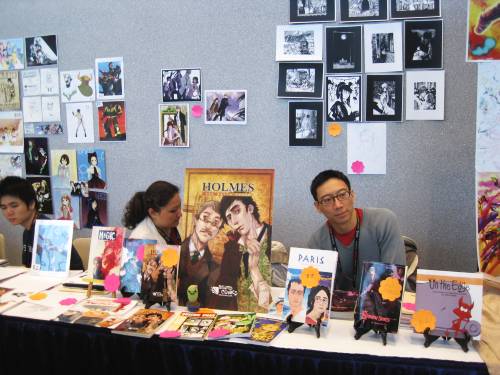
Bento Table

Here's our setup for Bento Comics. The Sherlock Holmes anthology sold very well!


The other interesting piece of news is that I’ve learned to crochet. Finally. I’ve long been a knitter, but the last time I took up crocheting was a horrible accident, so I’ve not attempted crochet since… until now. It turns out that with a few good internet instructional videos from Youtube and a bit of patience, I can crochet just fine. I fumbled the first few attempts, but I seem to be doing quite well, so well that when I crocheted a little smiley cactus, I sold it off at NYCC quite quickly.

You’ll see more crochet from me later on, but for now, I leave you with the first thing I ever crocheted. It’s “Peanut Bear” (more like Amputated Bear) from Nerdigurumi, which is a great beginner pattern (with videos). I later added arms and legs to this pink bear, so it looks a tad different now.


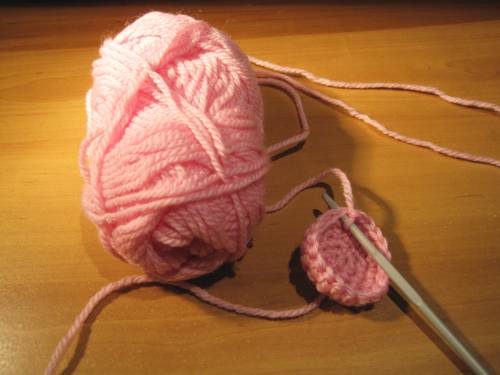
Step 1: Start the top of the bear with a "Magic Circle". Took me ages to get this right.


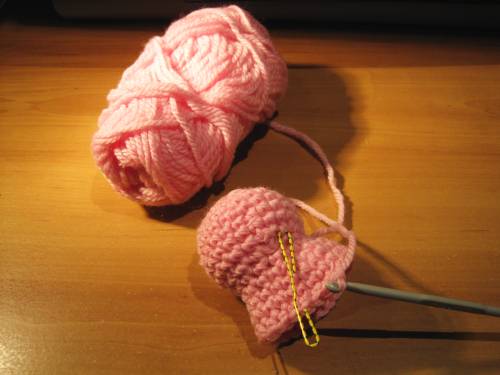
Step 2: Started making the body. By now, I can stitch increase and decrease pretty well.


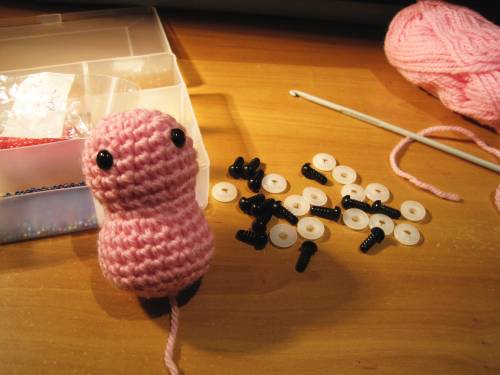
Step 3: Added some plastic eyes to it. I had some left-over from my little animal knittings from earlier.


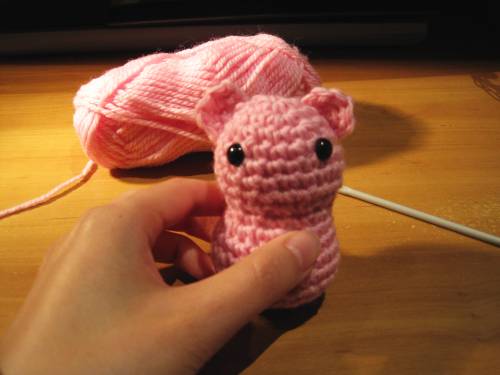
Step 4: Sewed ears onto the bear. You can also sew other ears, like dogs/cats/rabbits, which would make it a different kind of Peanut animal.


Now for the final finished, limbless Peanut Bear. Don’t worry, I DID put arms and legs on it later:


Peanut Bear